While the thought of spending time building a program to meet your funeral home needs may sound intimidating to some, rest assured that the time spent personalizing Memorial Director is far easier than one may think and certainly easier than embalming a deceased.
Even for the busiest funeral home, Memorial Director’s web-based program is so simple that personalizing the program to match your business’ demands can be done in between waiting for the medical examiner to authorize a cremation permit or sitting on the telephone waiting for an insurance company to answer the phone.
First Call/Adding Decedent
We all know how it is to get a call in the middle of the night. The person “on call” frantically grabs the nearest piece of paper and a pen before scribbling the decedent’s information received from the answering service or in, some cases, information from a distraught family who happens to have your home phone number.
At that point, the “on call” person gets dressed in the dark; travels to the funeral home to grab a new “paper” file that is filled with authorization forms for the family to sign.
Unfortunately, on occasion, the person making the body removal discovers upon their arrival to the deceased, that somewhere between the bedroom and the deceased’s location, the piece of paper that had all the deceased’s pertinent information on it has gotten lost in the shuffle.
The good news is with Memorial Director there are no more scraps of paper to be lost. As long as the person making the removal has access to the internet through a phone, tablet or computer, all the deceased’s information and forms can be accessed immediately.
So, let’s get started with this easy process from the onstart of receiving a death call.
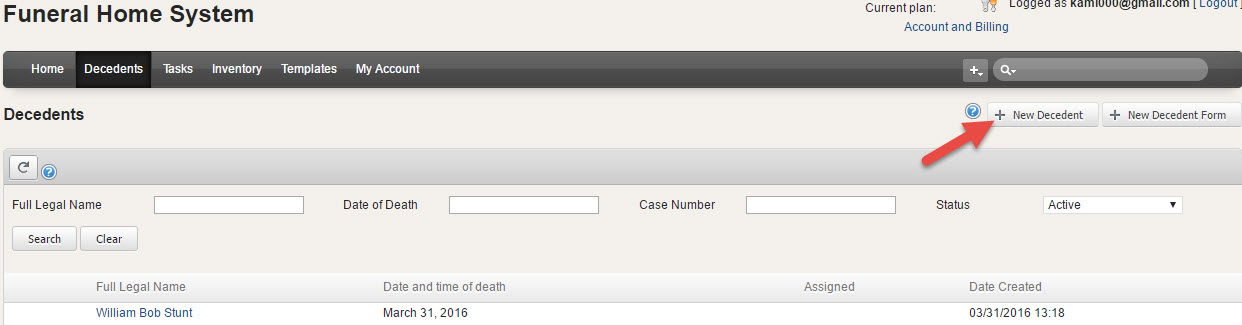
Instead of searching for paper and pen, just login into Memorial Director and enter the caller’s and deceased’s information. To do this, from the Home page, click the New decedent tab at the upper top right of the screen. (See below)
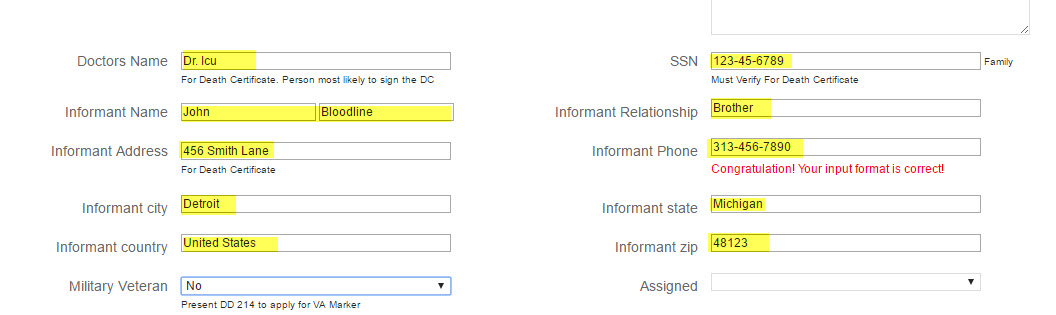
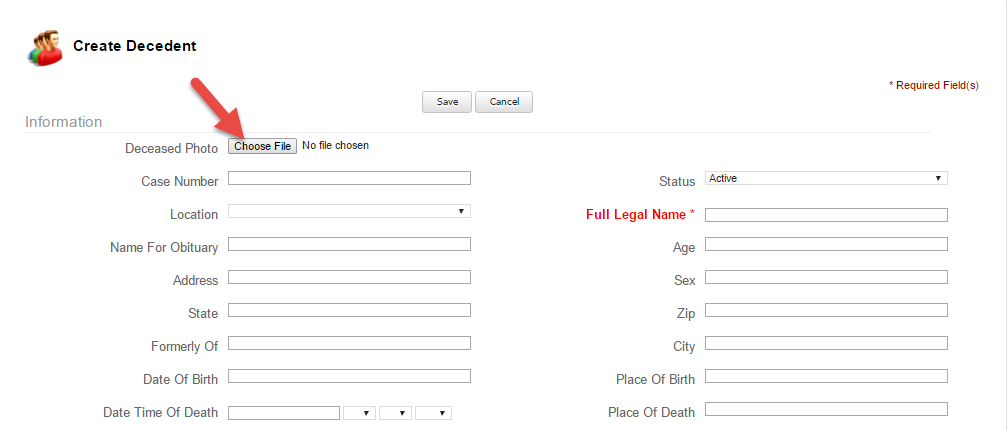
A new page for decedent’s information will appear, and while not information will be available during initial contact with the caller, the person on call may use the web form to record what information he/she has obtained. Critical and pertinent information that can be inputted includes the name; age; address; sex; date of birth; date and time of death; place of death; name of attending doctor; social security number; informant’s name, address, phone number; and relationship to deceased. See the two pictures below showing what information can be immediately entered into the program for future access.
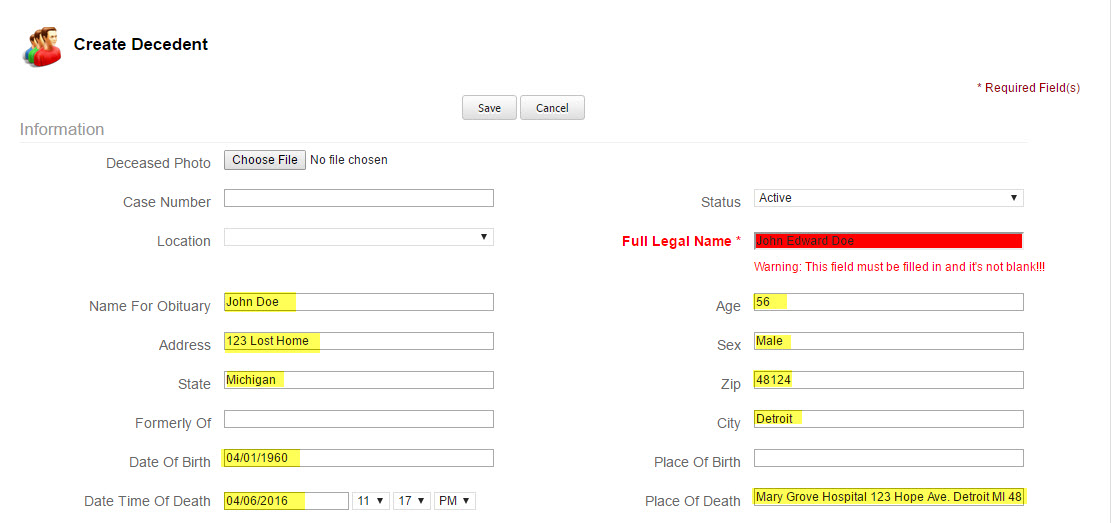
Notice the red field in the above illustration? At times, Memorial Director will automatically prevent the user from saving data if the required fields are not filled out correctly, thus eliminating future errors. Other times, Memorial Director will point out that the user entered data correctly. (See below image)
After the “first call” information is inputted, it is important to save the data by choosing the save button below the doctor’s information.
Funeral Arrangements
Adding Photos
The user can scan photos into the funeral home’s computer system and then upload them into Memorial Director. If the user doesn’t have the photo on hand, that’s okay, because when it is received from the family, the photo may be uploaded to Memorial Director at that time. Let’s proceed with uploading a photo, which will only take a couple quick steps.
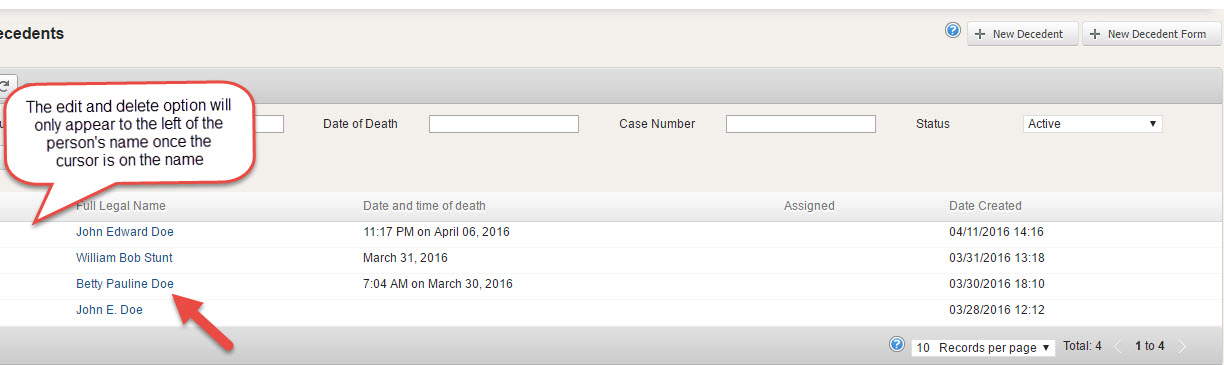
From the “Home” page of Memorial Director, choose the Decedent’s tab.The user will see a list of names that were already inputted into the computer system.
In this case, we will use Mr. John Doe by placing the cursor over his name. The user can either click on the person’s name, which is in blue or immediately choose to “edit” or “delete” the person, which is an option that will only appear to the left of the name when the cursor is on the person’s name.
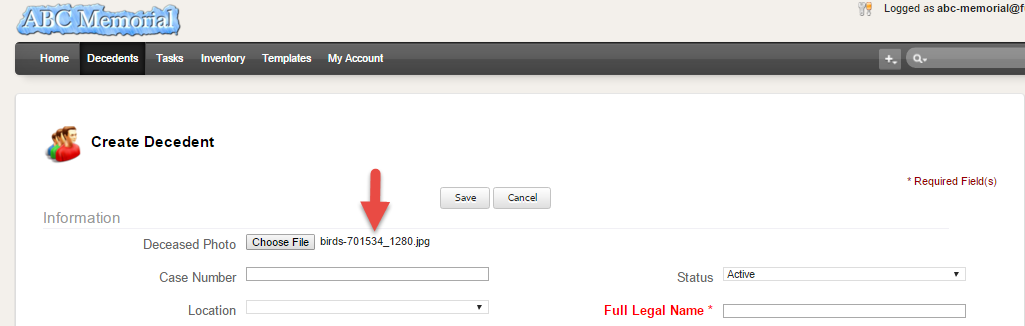
Now to upload a picture, click on the Choose file and then from the funeral home’s computer choose the appropriate photo.
The photo will upload and the user will be able to see the file name on the screen. (See below image)
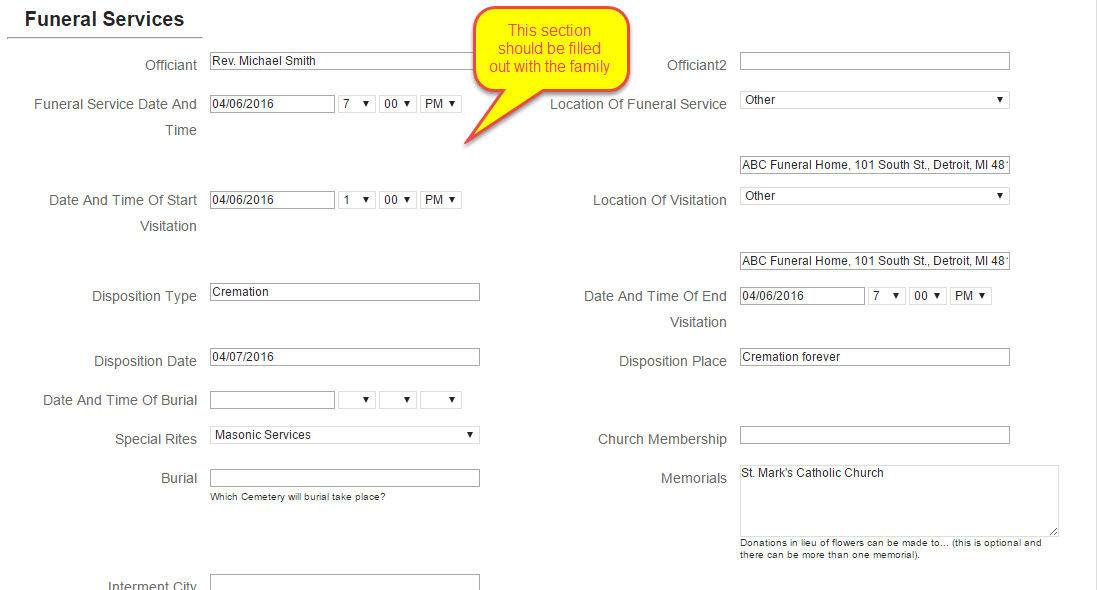
Funeral Services
The rest of the decedent information on the form is self explanatory and should be inputted into the web application once the family arrives and details of the particular service are organized. There are three sections that need to be completed. The first is the Funeral Services.
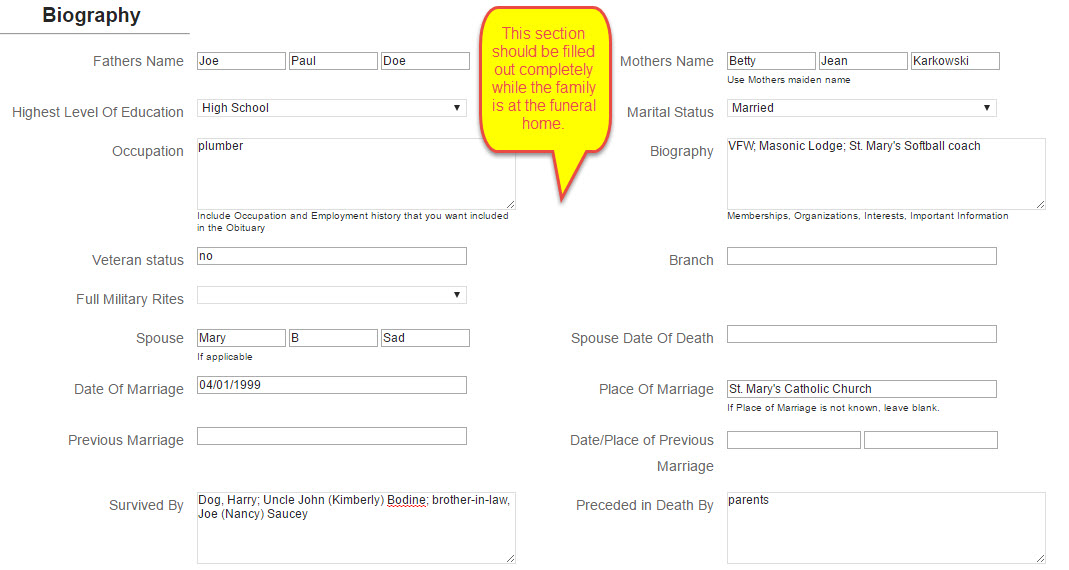
Biographical Data
The second portion of the screen asks for the Biography of the deceased. Again, this section should be completed with the family present. Any information that is not available at the time of the initial meeting may be filled in at a later date
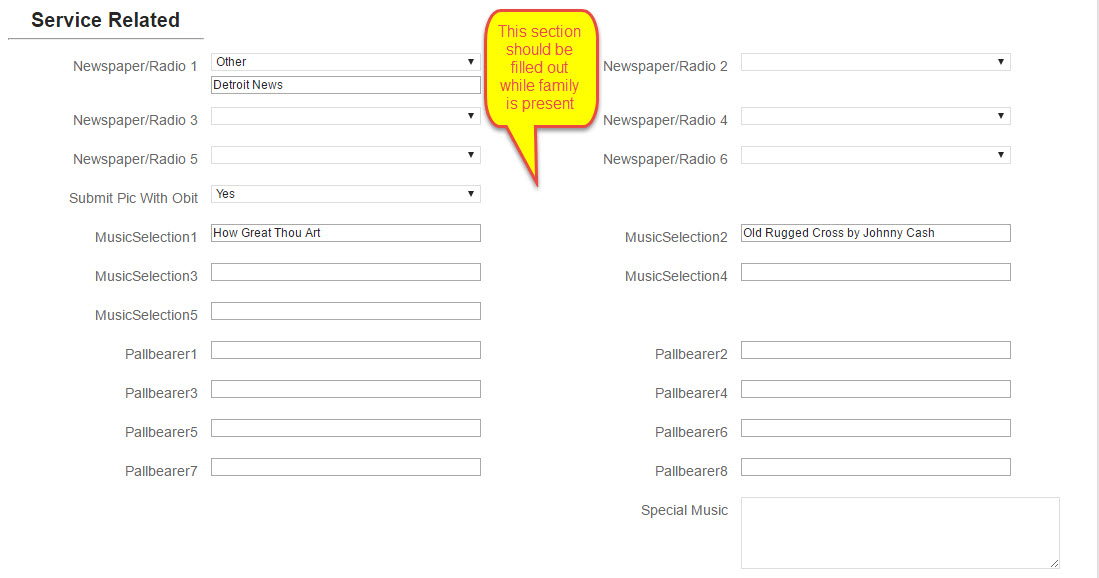
Service-Related Details
The third section refers to additional Service-Related details and should be used, so that no mistakes are made during the service. Information that can be added includes music selections; obituary publication preferences, etc.
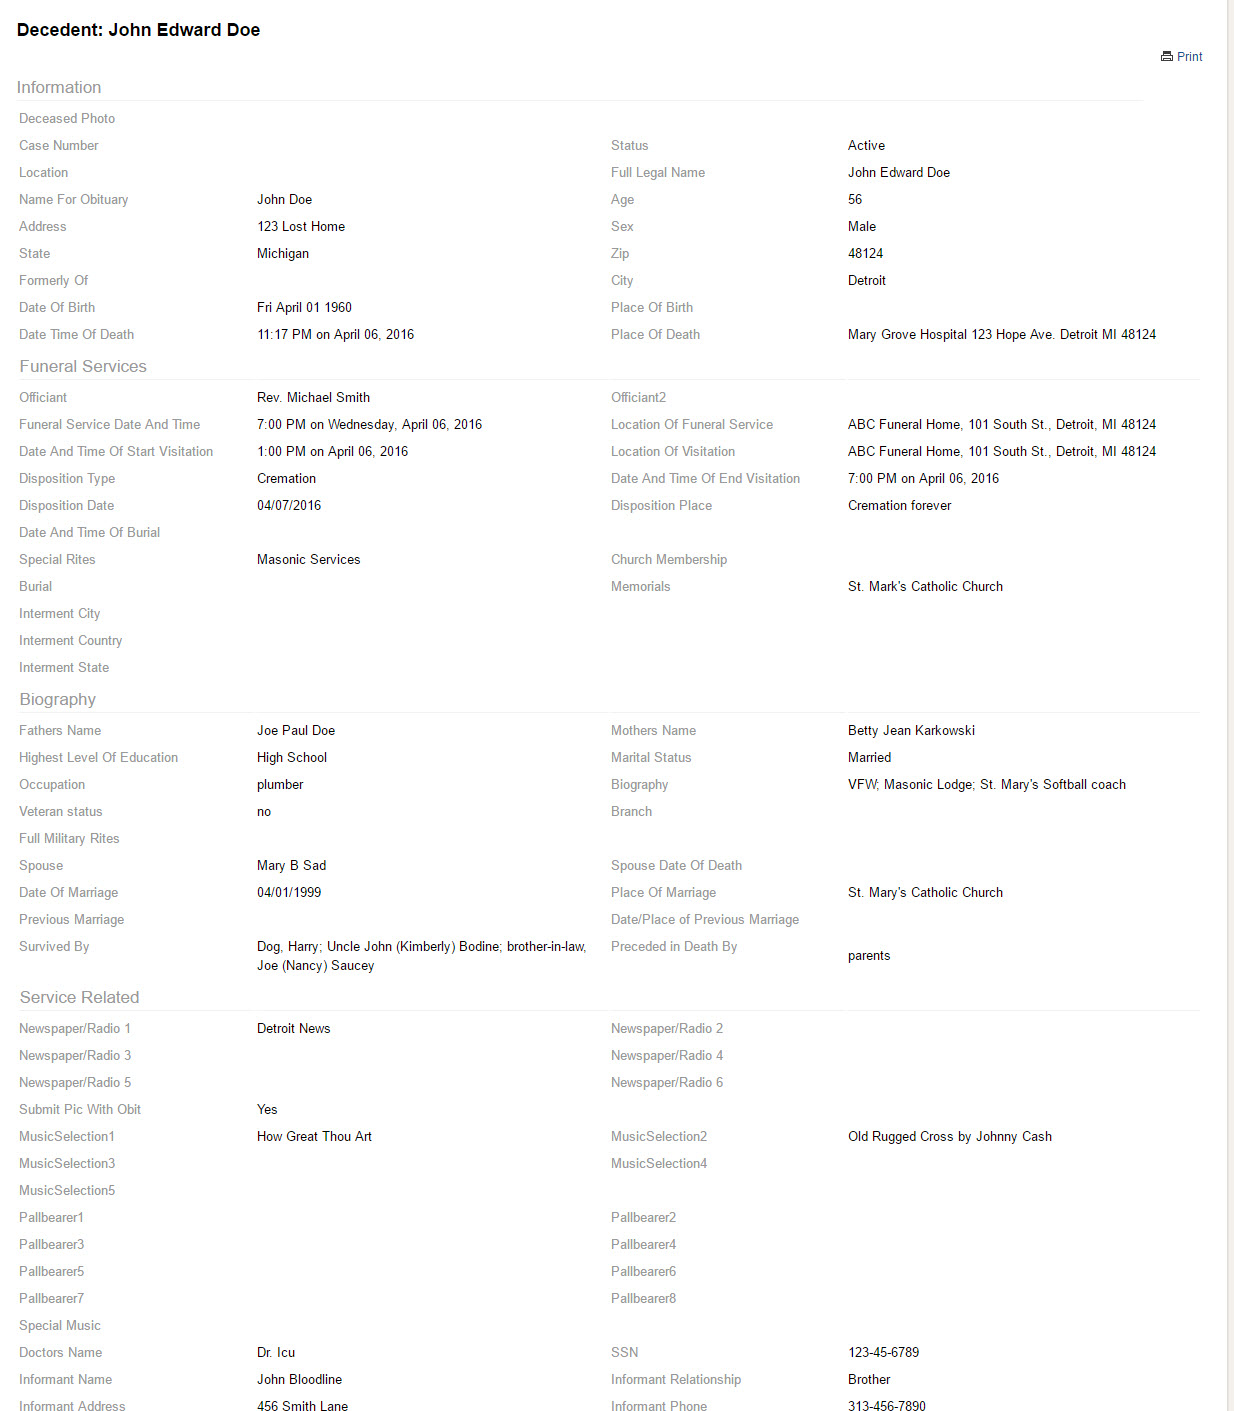
Once the biographical and pertinent information is received from the family and inputted into Memorial Director, save the document by choosing the save button at the bottom of the screen. Once the document is saved you will be brought to a new screen where the information you inputted is pre-populated. (See image below)
Adding Merchandise
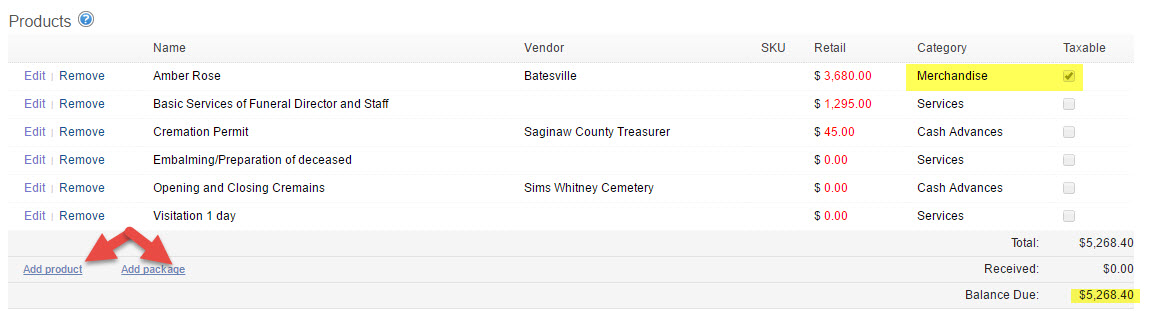
Now, that all three sections are filled out and saved, the screen will show the user an option to add merchandise, services, cash advance and/or package sales. Again, the fields are very simple to follow. The user only needs to choose the “add product” or “add package” option to complete the client’s final statement.
If the user chooses add product the user will have an option to add services, merchandise or cash advances – all of which are items that were inputted into the web program during Memorial Director setup. Choose which area of services you are adding to the client’s statement, and all the prices and final total, including taxes, are calculated in the program. (See image below)
Adding Payments
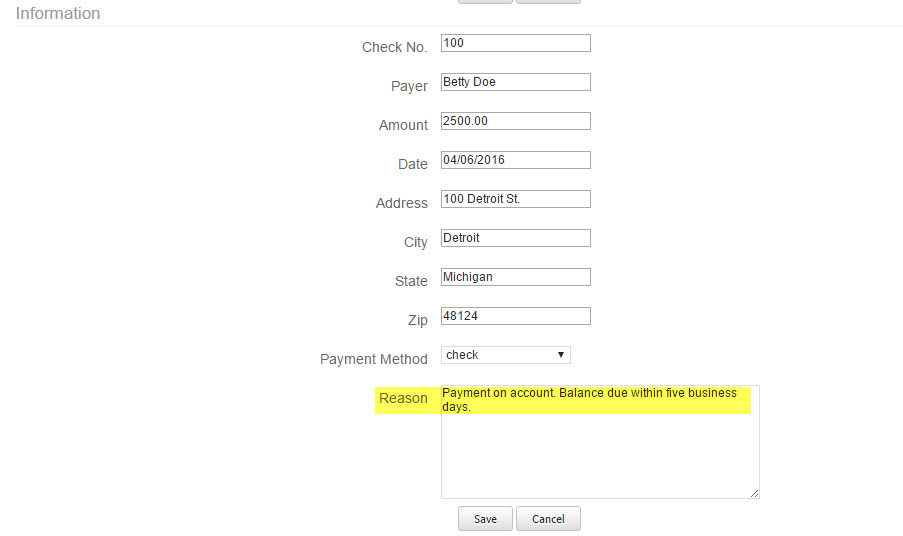
The next section of the screen allows the user to add payments and/or add discounts by choosing the appropriate option. When the add payment option is chosen, the user can record all information regarding who made the payment, the date, check number, notation field, etc. Again, after the information is entered into the program, choose save. (See image below)
Once the payment is recorded and saved, the payment will show on the screen with the new balance calculated. A receipt can now be printed for the client by choosing receipt. A screen will pop up with a print option for the user to choose. (See images below)
![]()
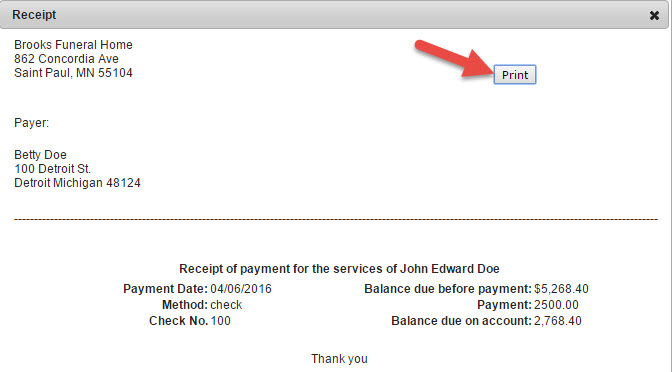
There is also a print option located next to the receipt option on the screen where the payment is reflected. The print option allows the user to download the receipt into a PDF format and then the user has the option to print the receipt from there or attach the PDF in an email to the client versus relying on a paper receipt.
Adding Discounts
There are times when funeral homes offer discounts for clients, sometimes for returning families; family members; veterans; and the like. To add a discount it is exactly the same steps as inputting a payment into the Memorial Director except the user chooses the add discount option and does not add the check number etc., but instead states why the discount is being given in the reason field. (See the two images below)
![]()
![]()
Forms For Signature
While the client is sitting there, the user has the option of printing an embalming authorization form, which can be signed after printing or on the screen of a tablet or touch screen computer. Any form may be printed or emailed to the customer by using the download option for downloading and printing a PDF document or send email option for emailing a copy of the document to the client. (See below image)
Contacts
The next portion of the program allows the user to input additional contact names; notes; and tasks. Additional contact names may be used for family members who the funeral home is in contact with to accomplish certain items needed for the funeral. For example, a sibling may be handling the writing of an obituary and the funeral home may need to contact them later with a question. Use the new contact field to enter the appropriate information obtained while the family was at the funeral home.
To add a new contact, choose the new contact option. A new screen will appear showing the customer’s name along with a field where the user can input the contact’s name and other pertinent information, such as special notes. (See image below)

Once the information is correctly inputted, choose save, so the information may be retrieved and/or seen by all funeral home personnel who have been authorized Memorial Director permissions. (See image below)
![]()
Additional Notes
Additional notes about the decedent’s case may also be inputted in a note section on the same screen. The information may be added at anytime by choosing new note and inputting the details.
![]()
After the new note is chosen, simply add a subject and add the information that is needed in the body section and choose save.
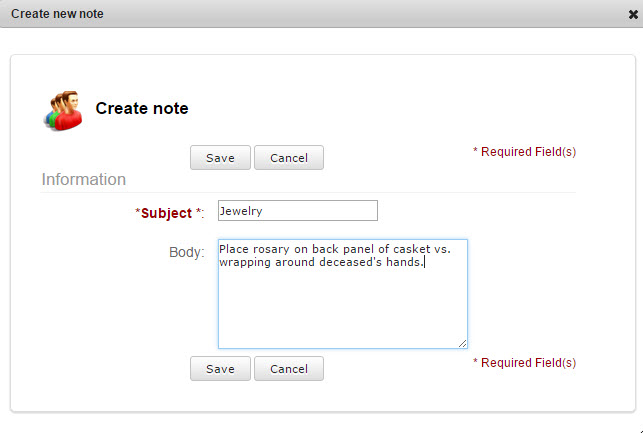
Once saved, the information will appear on the screen. (See image below)
![]()
Memorial Director will show who entered the note, and it may be edited and/or removed at anytime by choosing the appropriate option to the left of the screen.
Tasks
Tasks are completed by following the same steps for adding a note; however, a user may actually assign the task to a specific person at the funeral home. There are also date fields to specify when a task starts and ends, as well as a field for designating the level of priority for each task to be completed.
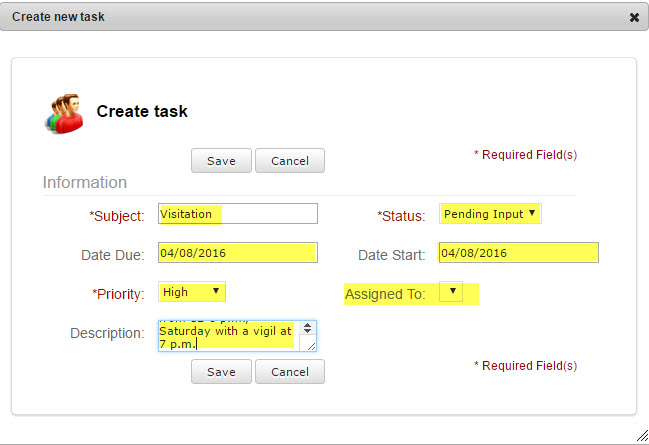
In the above example, it gives all users the ability to see what has been assigned and to whom, in addition to the name of the user who inputted the task. The assigned personnel can respond and update the task as it is completed. In the below example, it shows the task is Pending input by the assignee.
![]()
After the assigned user sees the status, he/she is able to edit the task with the following options located in the drop-down menu under status:
1. Not started
2. In progress
3. Completed
4. Pending input
5. Deferred or
6. Closed
(Note, drop-down menus may be edited at anytime through the control panel)
In the below example, it shows the assigned user saw the assigned task and acknowledged it by changing the status to in progress.
![]()
PREPARING FUNERAL/DOCUMENTS
After the family is gone, the user can prepare for the funeral by sending necessary documents to the appropriate parties involved with the funeral, such as the clergy, military and newspaper.
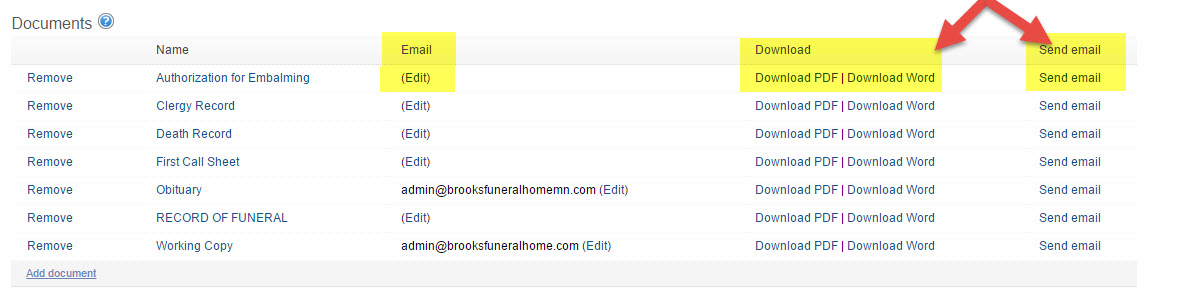
To begin sending documents or printing forms, put your cursor on the appropriate form the user wants to email or print and choose whether or not to download the document or email the form to a specific person. If the user wants to email the document to a specific person, choose the edit option under the Email heading; enter the email address of the person receiving the email; and choose save. The recipient’s email address will appear on the screen once the save option is chosen. (See below image)
Exporting Customers
Exporting customer information into a spreadsheet is another feature made possible with Memorial Director. From the control panel, choose Export Customers and the data is downloaded as a .CSV file onto the funeral home’s computer and can be opened for analysis in a spreadsheet program such as Excel.
![]()
Conclusion
So, there you have it, Memorial Director, bringing funeral homes into the 21st Century. If for any reason a user gets stuck on any portion of Memorial Director, feel free to chat with our Customer Service team.